Rock tumbling is a fascinating hobby, transforming rough stones into polished gems! From Deep Purple’s impactful In Rock album to Ozzy Osbourne’s collaborations, rock’s spirit inspires;
Discover how to recreate this magic at home, mirroring the energy of ROCK FM’s celebrations of rock history and modern sounds, and Space Rock!
What is Rock Tumbling?
Rock tumbling is the process of smoothing and polishing rough stones and rocks using a rotating barrel and a sequence of abrasive grits and polishing compounds․ It’s a surprisingly simple, yet incredibly rewarding hobby, allowing you to transform dull, ordinary rocks into beautiful, gleaming gemstones․ Think of it as a miniature version of the natural processes that shape pebbles on a beach, but accelerated and controlled․
Inspired by the enduring energy of rock music – from Chuck Berry’s classics to the modern sounds featured on ROCK FM – tumbling mirrors the dedication and refinement inherent in musical artistry․ Just as bands like Deep Purple honed their sound, tumbling gradually refines the stone’s surface․ The process involves several stages, each utilizing a different grit size, culminating in a brilliant polish․ It’s a journey of transformation, revealing the hidden beauty within each rock, much like discovering a favorite song!
Benefits of Tumbling Rocks
Rock tumbling offers a multitude of benefits, extending beyond simply creating beautiful stones․ It’s a deeply relaxing and meditative hobby, providing a creative outlet and a connection to the natural world․ The rhythmic tumbling action can be surprisingly soothing, much like immersing yourself in the vibrant energy of a ROCK FM broadcast or the timeless sounds of Space Rock․
Furthermore, tumbling is an affordable way to create unique jewelry, gifts, or decorative items․ It encourages patience and attention to detail, mirroring the dedication of artists like Ozzy Osbourne revisiting and refining his work․ The finished products are tangible rewards for your efforts, showcasing the hidden potential within ordinary stones․ It’s a fantastic way to learn about geology and appreciate the beauty of natural materials, inspired by the enduring legacy of rock legends like Deep Purple and Chuck Berry․

Gathering Your Supplies
To begin your rock tumbling journey, assemble essential tools! Like preparing for a ROCK FM event or a Space Rock listening session, preparation is key․
You’ll need a tumbler, grit, polish, and, of course, rocks – let’s get started!
Rock Tumbler Selection
Choosing the right rock tumbler is your first crucial step, much like selecting the perfect venue for a ROCK FM concert or preparing for a Space Rock broadcast! Consider barrel size – larger barrels accommodate more rocks but require longer tumbling times․
Single-barrel tumblers are simpler and more affordable, ideal for beginners․ Rotary tumblers are common, offering a gentle tumbling action․ Vibratory tumblers, while pricier, are faster and produce a superior polish, mirroring the high-energy sound of Ozzy Osbourne’s latest tracks․
Look for a durable motor and a tightly sealing barrel to prevent leaks․ Read reviews and compare models․ Don’t skimp on quality; a reliable tumbler will provide years of enjoyment, transforming rough stones into beautiful polished gems, just like the evolution of rock music itself, from Deep Purple to today!
Abrasive Grit – Stages 1-3
Abrasive grit is the engine of rock tumbling, progressively shaping and smoothing your stones – a process akin to refining a song from a raw ROCK FM recording to a polished hit! Stage 1 uses coarse grit (typically 60/90) to remove imperfections and shape the rocks․
Stage 2 employs medium grit (120/220) to smooth the surfaces created in Stage 1․ This stage refines the shape and prepares the rocks for finer polishing, much like a band rehearsing before a live performance, inspired by Space Rock energy․
Stage 3 utilizes fine grit (500/600) for pre-polish smoothing․ Each stage requires fresh grit and a ceramic filler․ Thorough cleaning between stages is vital to prevent contamination, ensuring a brilliant final polish, echoing the clarity of Deep Purple’s sound․
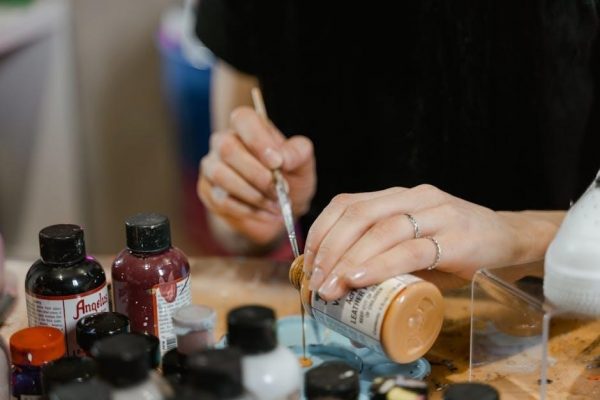
Polishing Compound – Stage 4
Stage 4 is where the magic truly happens – the polishing stage! Unlike the abrasive grits, polishing compound doesn’t grind away material, but rather burnishes the surface to a high shine, similar to the final mastering of a track for ROCK FM airplay․
Aluminum oxide is the most common polishing compound, creating a durable, brilliant luster․ Add the polishing compound, ceramic filler, and water to the tumbler barrel․ This stage takes longer than the grit stages, often several days, demanding patience․
Regularly check the progress, and remember, a clean barrel and rocks are crucial․ The final result should resemble the polished sound of a classic Ozzy Osbourne track – refined, powerful, and captivating, just like the energy of Space Rock!
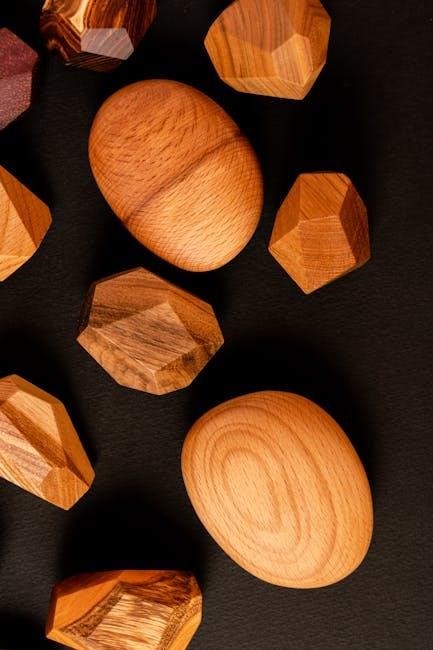
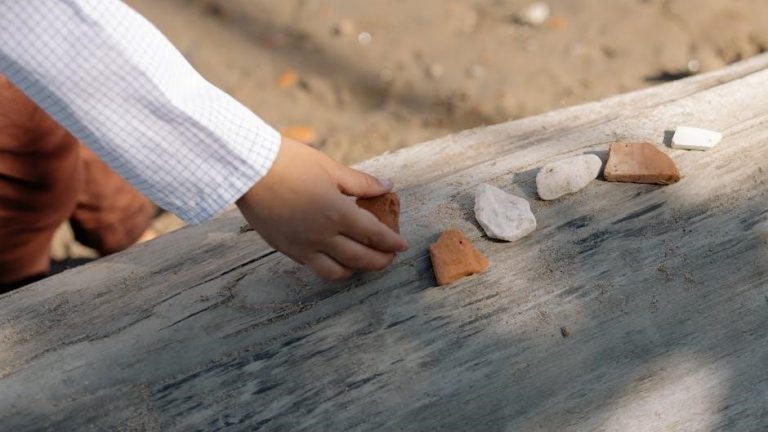
Rocks for Tumbling
Not all rocks are suitable for tumbling! Harder stones like quartz, agate, and jasper work best, mirroring the enduring quality of classic rock anthems celebrated on ROCK FM․ Softer rocks like shale or sandstone will disintegrate during the process․
Look for rocks with a Mohs hardness of 6 or higher․ River rocks are a good starting point, but ensure they aren’t too porous․ Avoid rocks with fractures or inclusions, as these can cause them to break apart, similar to a poorly mastered recording․
Consider the aesthetic – imagine the finished product! Just as Deep Purple’s In Rock album changed the musical landscape, tumbling can reveal hidden beauty within ordinary stones, creating something truly special, like Space Rock!

The Tumbling Process: A Step-by-Step Guide
Embark on a four-stage journey, echoing ROCK FM’s musical evolution! From coarse shaping to a brilliant polish, unlock each rock’s potential, like Space Rock!
Stage 1: Coarse Grit – Shaping
The initial stage utilizes coarse grit to dramatically reshape your rocks, removing imperfections and establishing the desired form․ This process, much like the foundational elements of rock music celebrated by ROCK FM, is crucial for the final outcome․ Fill the tumbler barrel approximately two-thirds full with rocks and cover them completely with the coarse grit, then add water until it reaches just below the top layer of stones․
Run the tumbler continuously for seven days, checking water levels periodically․ This extended tumbling action, reminiscent of the enduring legacy of bands like Deep Purple, aggressively grinds away at the rough exterior․ Inspect the rocks; they should show significant shaping, with sharp edges rounded and noticeable material removed․ Don’t be alarmed by the slurry – it’s a sign of progress, similar to the raw energy of Space Rock!
Stage 2: Medium Grit – Smoothing
Following the coarse grit stage, transition to medium grit to smooth the surfaces shaped in Stage 1․ This step refines the rock’s form, preparing it for the finer polishing stages – a process akin to the evolution of sound celebrated by ROCK FM, from raw energy to refined artistry․ Thoroughly clean the tumbler barrel, removing all traces of coarse grit․ Add fresh rocks, medium grit, and water, again ensuring the water level is just below the top of the stones․
Run the tumbler for another seven days, monitoring water levels․ The slurry will be finer than in Stage 1․ This stage removes the scratches left by the coarse grit, creating a smoother texture, much like the polished sound of artists like Ozzy Osbourne․ Inspect the rocks; they should feel noticeably smoother to the touch, signaling readiness for the next phase․
Stage 3: Fine Grit – Pre-Polish
Now, move to the fine grit stage, building upon the smoothness achieved in Stage 2․ This is a crucial pre-polishing step, removing any remaining imperfections and preparing the rocks to truly shine – mirroring the refinement of sound showcased on ROCK FM․ As before, meticulously clean the tumbler barrel, eliminating all traces of medium grit․ Add your rocks, fresh fine grit, and water, maintaining the correct water level․
Run the tumbler for seven days, checking water levels regularly․ The slurry will be very fine․ This stage creates a surface receptive to polishing, similar to how Deep Purple’s In Rock album laid the groundwork for future rock innovations․ Inspect the rocks; they should have a dull sheen, indicating they’re ready for the final polishing stage․
Stage 4: Polish – Bringing Out the Shine
The final stage! Thoroughly clean the tumbler barrel, ensuring absolutely no fine grit remains – contamination will ruin the polish․ Add your pre-polished rocks and the polishing compound․ Unlike the previous stages, use only a small amount of water; the slurry should be creamy, not watery․ This is where the magic happens, revealing the hidden beauty within, much like the legendary status achieved by artists featured on ROCK FM․
Tumble for seven days, checking periodically․ The slurry will appear milky․ After tumbling, the rocks should exhibit a brilliant shine․ This stage is akin to the final mastering of a track, like Ozzy Osbourne’s re-release of Gods of Rock N Roll, perfecting the sound․ Rinse thoroughly and prepare for the finishing touches!

Cleaning and Finishing
After tumbling, meticulous cleaning is key! Like refining a ROCK FM playlist, rinsing removes residue․ Burnishing enhances shine, mirroring the polished sound of Space Rock!
Rinsing and Washing the Rocks
Following the polishing stage, thoroughly rinsing your rocks is absolutely crucial․ This removes all traces of polishing compound and fine grit that cling to the surface, preventing a dull or cloudy finish․ Begin by carefully emptying the tumbler’s contents into a colander․
Rinse under warm, running water, gently agitating the rocks to dislodge any remaining abrasive․ Continue rinsing until the water runs completely clear – this may take several minutes! A soft-bristled brush, like an old toothbrush, can help reach into crevices․
Inspect each rock individually, ensuring no grit remains․ Think of it like curating a perfect ROCK FM playlist – every element must be clean and refined․ A final wash with mild dish soap can help remove any stubborn residue, but be sure to rinse thoroughly afterward to avoid soap scum․

Burnishing for Extra Shine
To elevate your tumbled rocks from simply polished to brilliantly lustrous, consider burnishing․ This final step utilizes a specialized compound – often a very fine polishing powder or even just soap – and clean water within the tumbler․ Run the tumbler for a short period, typically 30 minutes to an hour, without any additional grit․
The tumbling action, combined with the burnishing compound, gently polishes the rocks one last time, removing any microscopic surface imperfections․ It’s akin to the meticulous remastering of classic rock tracks, like those celebrated on ROCK FM, to enhance their quality․
After burnishing, repeat the rinsing process described previously, ensuring all traces of the burnishing compound are removed․ The result? Rocks with a depth of shine that truly captures the light, mirroring the vibrant energy of a live Space Rock performance!
Troubleshooting Common Issues
Like refining a classic Deep Purple track, tumbling requires adjustments․ Addressing problems – dullness or noise – ensures success, echoing ROCK FM’s dedication to quality!
Rocks Not Polishing
If your rocks aren’t achieving that desired shine, several factors could be at play․ First, ensure sufficient tumbling time in each grit stage – rushing the process, much like a poorly mixed Ozzy Osbourne track, yields subpar results․ Check for adequate grit replacement between stages; contaminated grit hinders polishing․

Rock hardness also matters․ Very hard rocks, like some quartz varieties, require extended tumbling․ Inspect your rocks for cracks or inclusions; these can trap grit and prevent a smooth polish․ Finally, consider the polishing compound – is it fresh and appropriate for your rock type? Remember, patience and attention to detail, mirroring the dedication of ROCK FM to its listeners, are key to success․ Like a Space Rock journey, it takes time!
Excessive Noise During Tumbling
An overly noisy rock tumbler often indicates an imbalance or mechanical issue․ Ensure the barrel is adequately filled – too few rocks create excessive rattling, similar to a poorly mixed Chuck Berry song lacking rhythm․ Conversely, overfilling can strain the motor․ Check that the barrel is securely fastened and the rubber lining is intact; a loose barrel amplifies noise․
Inspect the motor for unusual sounds, which might signal a failing component․ A slight hum is normal, but grinding or squealing requires attention․ Level the tumbler on a stable surface to minimize vibrations․ Remember, a smooth tumbling process, like a well-crafted Deep Purple album, requires balance and stability․ Don’t ignore the noise – address it before it leads to damage, echoing the careful curation of ROCK FM’s playlists!

Safety Precautions
Always wear a mask when handling grit, protecting your lungs, much like preserving the legacy of rock icons like Ozzy Osbourne․ Electrical safety is key!
Handling Abrasive Grit
Abrasive grit, essential for tumbling, demands respect and careful handling․ It’s a fine powder, easily becoming airborne during loading and unloading of the tumbler barrel․ Always wear a properly fitted dust mask or respirator to prevent inhalation, protecting your lungs from silicosis – a serious respiratory condition․
Work in a well-ventilated area, ideally outdoors, to minimize dust concentration; Avoid creating dust clouds; gently pour the grit instead of scooping․ Consider wearing safety glasses to shield your eyes from irritation․
Keep grit containers tightly sealed when not in use, and clearly labeled․ Dispose of used grit responsibly, following local regulations – do not pour it down the drain! Remember, like preserving the energy of bands celebrated on ROCK FM, careful handling ensures longevity and safety․

Electrical Safety with the Tumbler
Electrical safety is paramount when operating a rock tumbler․ Always ensure the tumbler is plugged into a grounded outlet, and never use extension cords if avoidable․ Inspect the power cord regularly for any signs of damage – fraying, cracks, or exposed wires․ If damage is detected, discontinue use immediately and have the cord replaced by a qualified electrician․
Keep the tumbler away from water sources; never operate it with wet hands․ Before cleaning or performing any maintenance, always unplug the tumbler from the power outlet․ Avoid overloading the circuit with other high-draw appliances․
Like the consistent energy of a ROCK FM broadcast, a stable electrical connection is crucial․ Treat your tumbler with the same respect given to legendary rock instruments – safety first!